
Even though I’ve been an Android developer for a while now, believe it or not, I hadn’t yet had a chance to get into the formalized side of writing Unit tests or UI tests for the apps I’d been involved in.
Luckily for me, I think now is one of the best times to actually learn more about testing because historically Android has had poor support for testing in all its forms.
Google has obviously been aware of this and in conjunction with the development of its tools (Android Studio), it now bundles a test support library with the SDK.
From my initial experience, here are a few tips for setting up tests in Android Studio (v1.3). As I learn more hopefully I’ll write a follow-up post with some basic unit and instrumentation tests.
Initial setup
For some reason this was the most frustrating part for me and a few others , but hopefully the following info can make things a bit easier for people.
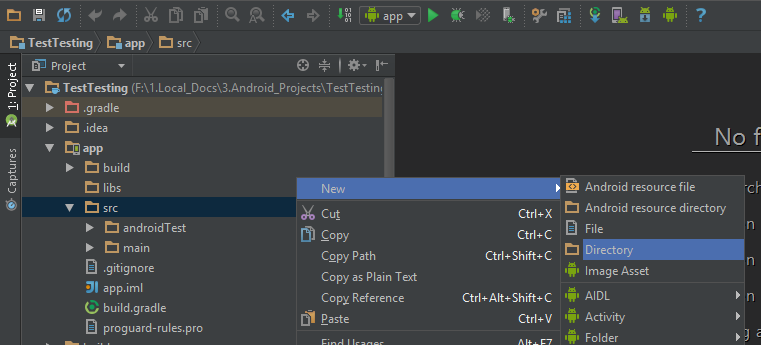
If you’re creating a new project, Android Studio (AS) will create the Instrumentation test area for you under the ‘androidTest’ directory. This will contain all UI tests i.e. Espresso & ActivityInstrumentationTestCase2 tests etc. as I currently understand it. If your adding testing to a older project and this directory isn’t there, you can add it just by right clicking on the ‘src’ directory and select ‘New > Directory’ to create it including the ‘Java’ and package directories too (see below).
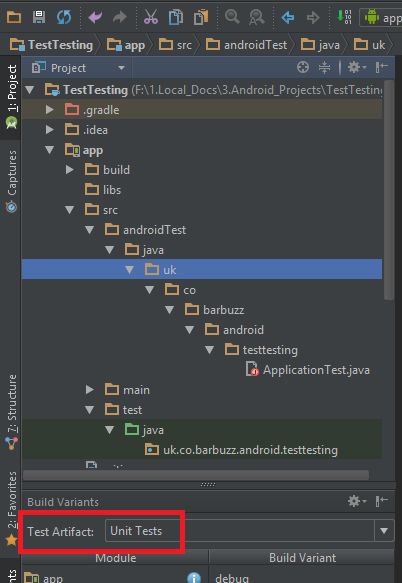
A quick tip for creating the similar unit test directory which is called ‘test’ is to create the directory and the ‘Java’ one underneath it and then switch the ‘Test Artifact’ drop down in the ‘Build Variants’ view from ‘Instrumentation’ to ‘Unit Test’. This drop down is used to switch between the different test groups and you’ll notice that AS renders these directories differently when each is selected. You can then highlight the top level of the package directories i.e. uk in this case, and then copy and paste from there to test > java (and delete the ApplicationTest class that’s copied).
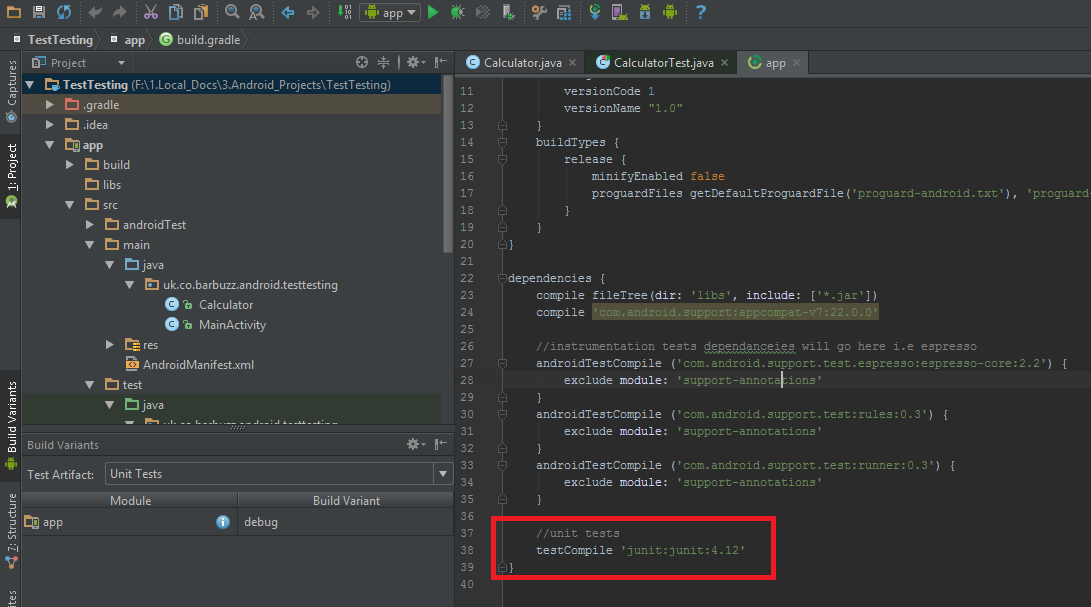
This gives us our basic test project structure. Before we create our tests we need to add the JUnit dependency to our Gradle file ( testCompile ‘junit:junit:4.12’ ). I’ve included the Espresso dependencies as well in the screen below which relate to the Instrumentation UI testing section but will talk more about this in another post. As you can see the dependencies are prefixed with the appropriate directory names to match each type of testing (‘androidTest’ & ‘test’).
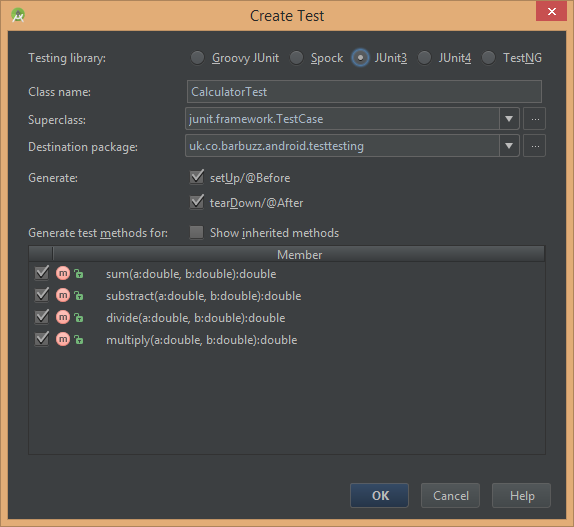
The next step is to create some tests and run them. A nice shortcut to create tests from your classes is to open the class you’d like to test, right click in the class window and select Go To > Test .
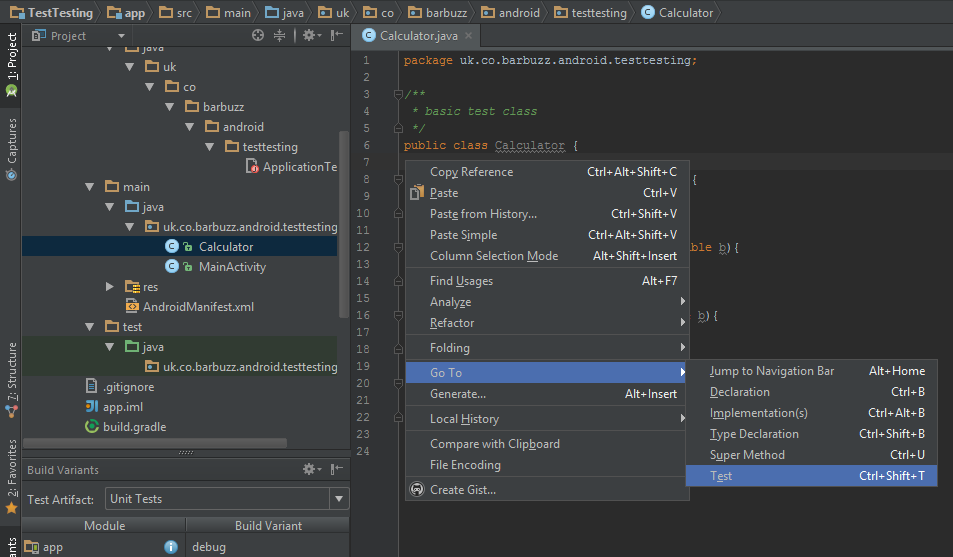
AS will then create a test in the appropriote test area (selected in the Test Artifact drop down) with the basic methods for the ones you’ve selected.
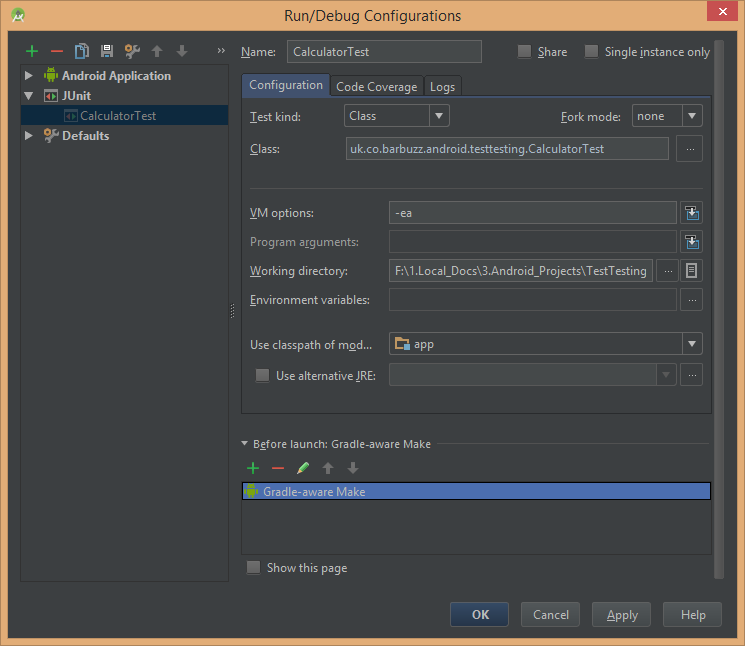
Running the Unit Test seemed straightforward initially, but one gotcha that’s worth remembering is that once you’ve created a test in the Unit Test section, to run it you need to replace the default make command with a ‘Gradle-aware Make’ and leave the task blank when prompted.
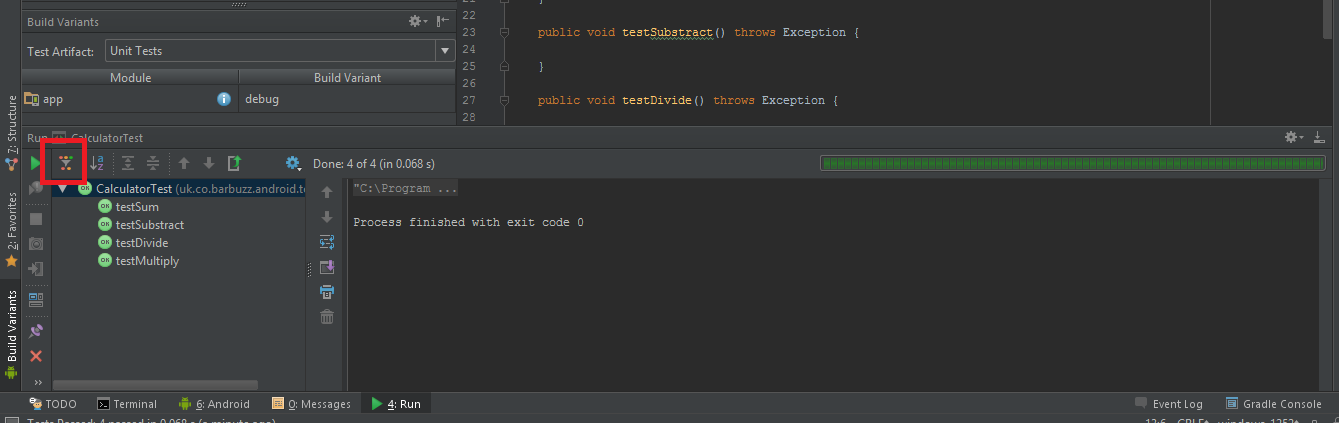
When you then right click on your new test and select run you should get something like the following. The highlighted button toggles display of all passed tests which default to hidden.
After I’d compiled this blog post I found a great article that Google has created on a website called Codelabs . This takes you through the same process as above with an example of the espresso UI testing as well. Find it here.
Hopefully this has helped ease some of the initial difficulties of getting testing up and running in Android. As I pick up more on testing techniques I’ll try and share them here.