

The Google Cloud Test Lab first came to my attention in Google I/O 2015 and was one of announcements that was ‘coming soon’ at the time. It wasn’t until about a month ago that I received an email after signing up on the Google Test Lab website telling me that it was available to try out.
The Cloud Test Lab is made up of two features at the moment;
- Cloud Test Lab can run instrumentation tests that you write using Espresso or Robotium
- Use the Cloud Test Lab Robo test to simulate user actions and find crashes in your app
Also access to these features can be via the following.
- Google Play Developer Console – Here you can run tests on the app when you upload your app to the alpha or beta channels (assume this is the Robo automated tests).
- Android Studio – running your apps instrumentation tests in the Google Test Lab can be done from within studio after following these setup instructions. It’s fairly straight forward and is a nice feature to have allowing you integrate the extra test resource into your current testing setup if needed.
- Command line – direct access to run test can be accessed via the command line interface if you need to integrate them say for example into your Continuous Integration test suite.
- Google Developer Console – You can log into your Google Developer Console (not the Play store one) and once you’ve created a project and a billing account you can upload an APK file and get back test results from the instrumentation or Robo tests.
Google Developer Console
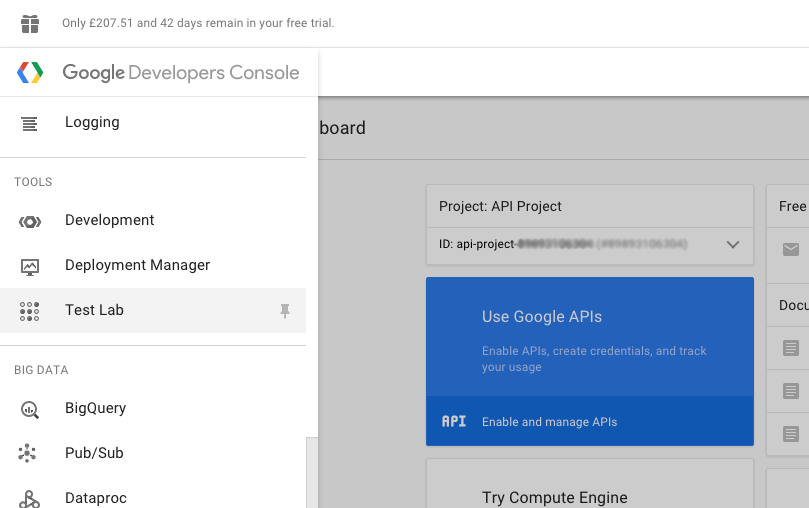
To start out with I looked at the Google Developer Console part of the Test Lab. Here you can either run instrumentation tests or the Robo test. The Robo test is basically like a more advanced version of the monkey runner test tool which most Android devs should be familiar with, were your apk file is uploaded to Googles servers and is run through a series of random tests.
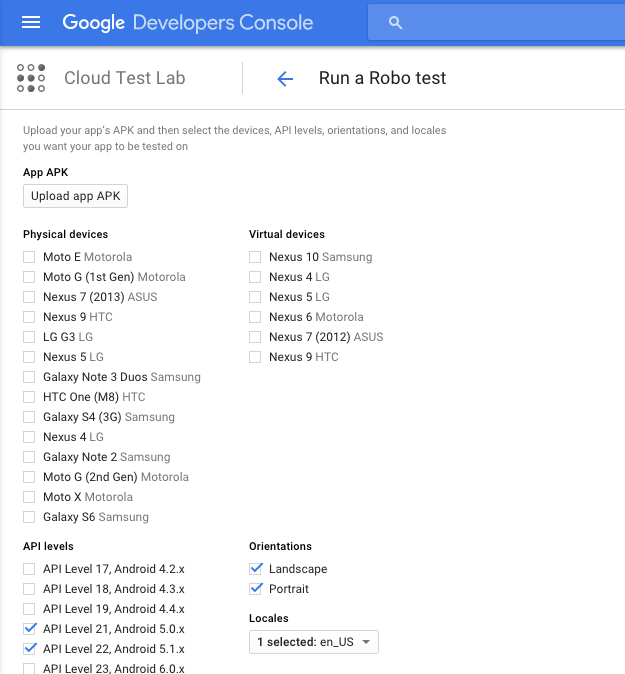
To get this working I logged into the Google Developer Console and then signed up for a trial account there to get access to the test cloud features (entering credit card info for identity authentication, which isn’t charged once trail ends). Once this is done you can access the Test Lab via the very well hidden side menu (it’s a burger menu at the top left – see screen above). Here you can upload your apk and select the devices and versions of Android you’d like to run the test on as shown below.
Once you’ve selected your options the Robo tests are run on the selected devices and the results along with screen shots are returned as seen in the example below. You can also drill down into each devices test results for more detail.
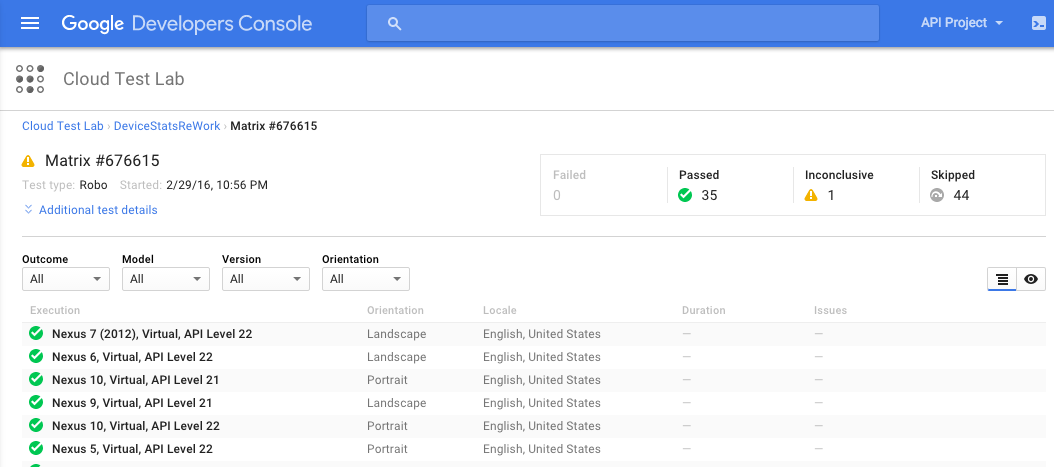
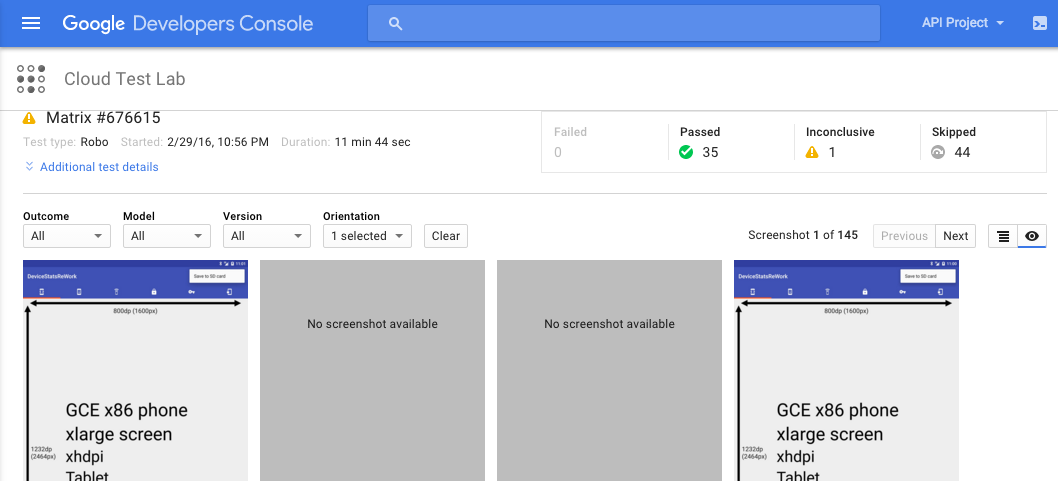
As you can see this is a good first stop for a quick test of you app and although the device list isn’t extensive it does give you a good variety of devices and API’s to test on.
Android Studio
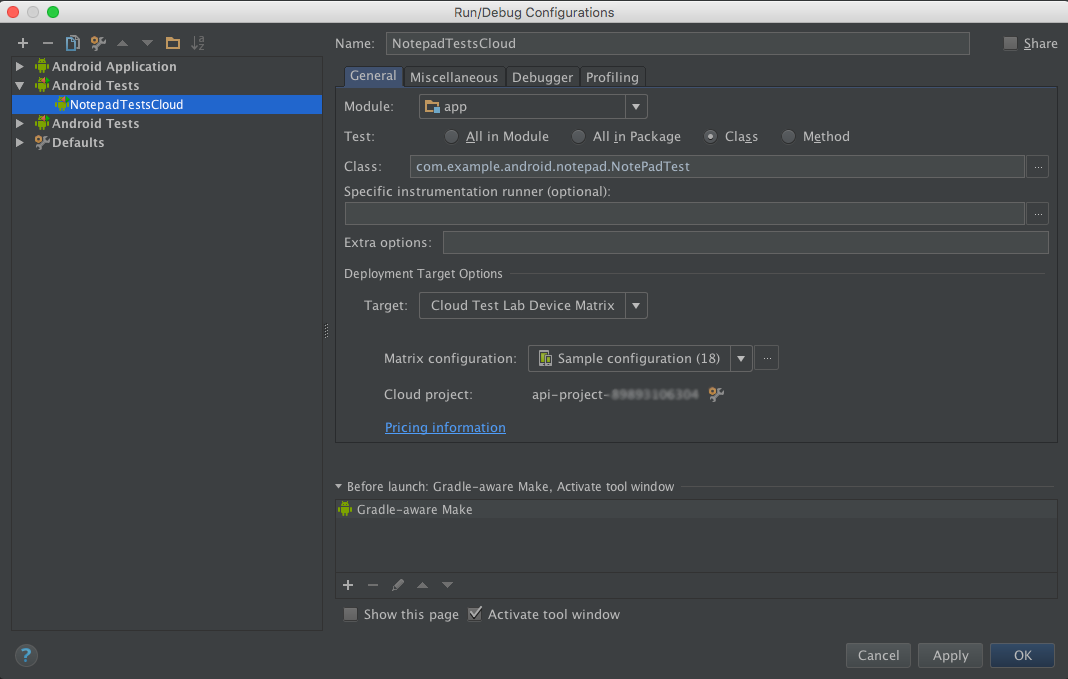
Next I thought I’d try out the instrumentation test side and run a UI test from within Android Studio. First create a custom run configuration for your project, which includes selecting a test class, authorising Android Studio with the Cloud Test Lab and then selecting a project and test config (see example below). Once created you then run the config like any other one.
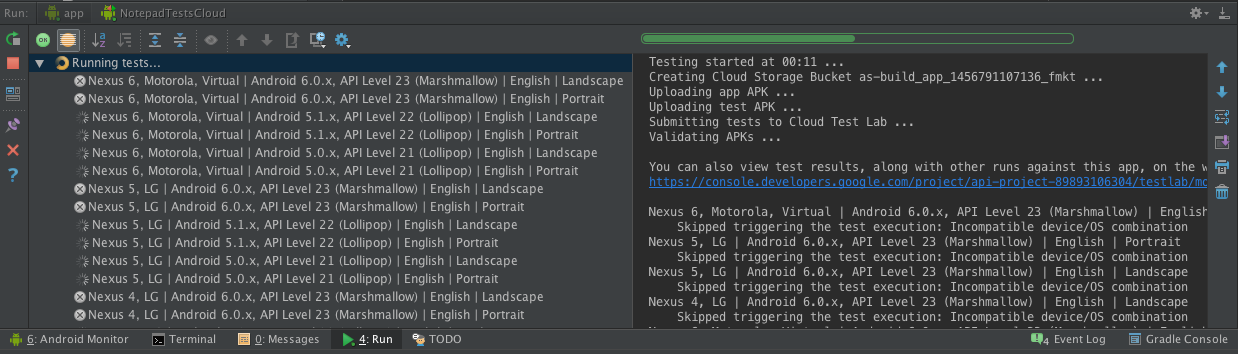
Results from the tests are output in the usual test runner window and a link is provided to see the screen shots if any have been taken. There is also a history of your test runs kept for you and for more information on analysis of the test results read up on them here.
I didn’t get round to trying the console method of triggering tests but hopefully this will give you an idea of what the main features are and allow you to experiment further.
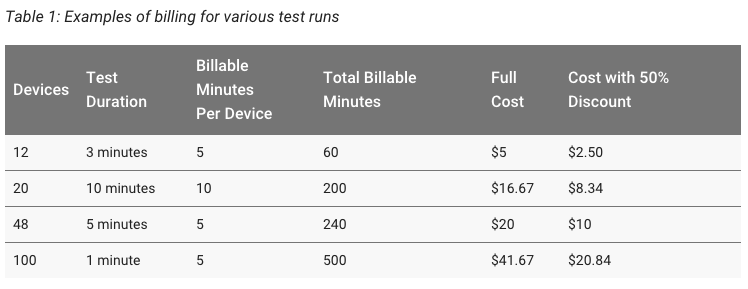
The pricing for the service is now on the website and seems fairly reasonable at $5 per hour for each device tested (billed per minute). There is also an initial incentive to sign up with some funds to spend at the start and a discount on the hourly rate. See some examples below and more details here.
I hope this gives people a good intro to the Test Lab and helps them get started. Let me know if you use it further and your experiences with it so far.