
![]()
Creating UI and graphics for app’s has always been a weakness for me, and I’m guessing most developers suffer the same problem. As I’m always keen to learn new techniques, I recently created a material type icon for myself and though it would be great to share for other developers reference (and my own).
I followed the technique used in this YouTube video, but there were a few times I had to rewind it to find out exactly what they were doing, which was another reason for writing it down.
The icon might not follow the material guidelines exactly, but the finished result looked good to me so I was happy to use it. (If there are any designers reading this it would be great to know if it conforms to the guidelines and if there are any better references out there, which I’m sure there are)
It’s using the freeware GIMP software (Mac & Windows) which I use for any quick graphics jobs at the moment. (mainly as its free & I don’t find the need to produce images very often)
So here are the steps.
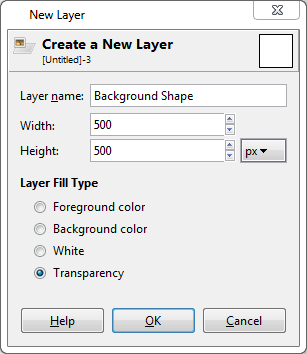
- Create a new file in GIMP with dimensions of 500 x 500
- Create a Layer called ‘Background Shape’ with the defaults
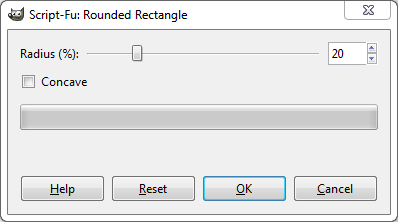
- Create a Rounded Rectangle by going to menu ‘Select’ and choosing ‘Rounded Rectangle’
- In the box that appears, change the corner radius % to 20
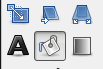
- Now select the colour you’d like to fill the rounded rectangle for the background, choose the fill tool (see below) and click on the rounded rectangle outline to fill it.
- At this stage I open one of the material icon images (largest size png) in a separate window in GIMP after downloading them from here
- I then used the magic wand selection to select and then copy the icon. Once copied you can go back to your material icon file and select Edit > Paste as > New layer (you can select this icon and use the align tool to get it centred)
- Create a new layer called ‘Long Shadow’

Note: at this point it’s worth checking the layers are in the order shown below

- With the ‘Long Shadow’ layer selected, select the lasso selection tool and create a selection in the shape of a 45 degree shadow to the bottom right of your icon (see the video above on how to do this. Also holding down Ctrl (win) in between selecting points allows you to draw a straight line which is handy for getting the 45 degree angle)
Once the shadow selection is made this was the bit of the video I managed to get wrong first time.
- Right click on the ‘Background Shape’ layer and select ‘Alpha to Selection’
- Now click back onto the ‘Long Shadow layer’ and from the ‘Select’ menu click ‘Invert’
- Then from the ‘Edit’ menu click ‘Clear’. This should then just trim the corner off the shadow created so it matches the background shape.
- Click on the ‘Long Shadow’ layer and change the opacity at the top of the layer list to 20%

- Right click on the ‘Background’ layer and select ‘Delete Layer’ (for a transparent background)
- Got to menu File > Export (Ctrl+Shift+E) and save as a png file and you have your new Material launcher icon!
Once I had the master icon done I then pull it into the Android Asset Studio website where I can generate the different resolutions for the launcher icon to import into my app.
Hope this helps some design illiterate devs out there like myself, and any feedback or further design tips would be great.